Experiments in Image Variation
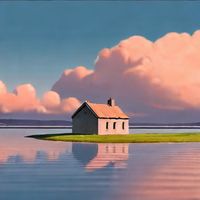
I've been doing a bunch of quick experiments for my improved CLIP Image conditioned version of Stable Diffusion v1. We can actually do lots of fun stuff with this model including transforming this Ghibli house into a lighthouse!
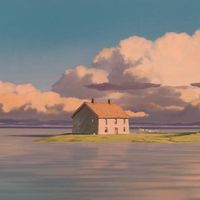
First off you can find the actual model on huggingface hub. Throughout the post we'll be using this crop from a Ghibli frame as our test image.
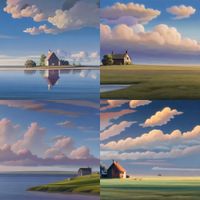
This is what the standard variations model produces when you feed this image in:
That was classifier free guidance scale 4, we can play with different levels of guidance: (0, 1, 2, 4, 8)
The image is turned into a CLIP image embedding, this is the condition vector. One thing I noticed is that because I set the unconditional embedding to zeros, scaling a condition vector has the effect of increasing its "strength", this effect is different to the usual classifier free guidance. We can play with the length of this vector to control the "strength" of the conditioning by multiplying the vector by 0.25, 0.5, 1, 1.5, 2:
We can also mix different embeddings by averaging them together. Let's mix between the embedding for our Ghibli image and a matisse painting. 0%, 25%, 50%, 75%, and 100% matisse:
Another way to mix is to concatenate the embeddings, yes we can have more than one if we want to. Here we do the following
- ghibli, ghibli
- ghibli, uncond
- ghibli, matisse
We can also use text embeddings to mix with our image embedding, we can mix with the word "flowers" to add flowers. (The variations model actually works fine with text embeddings btw). At the far right it's only using the text "flowers" (we re-invented a text to image model!). 0%, 25%, 50%, 75%, and 100% "flowers":
We can do the same trick of concatenating the embeddings instead of averaging, it's a bit funny though
- ghibli, flowers
- ghibli, flowers, flowers
- ghibli, ghibli, flowers
- ghibli, ghibli, flowers, uncond, uncond
More natural is to maybe use a direction in text embedding space to edit our ghibli conditioning. We can use the direction "still water" -> "wild flowers" and add this at different scales to your original conditioning. Here it's adding 0%, 10%, 25%, 50% and 100% of the edit vector "still water" -> "wild flowers":
Changing tack we can experiment with adding noise to our condition vector with scales = 0, 0.1, 0.2, 0.5
Or use multiplicative noise instead, scales = 0, 0.2, 0.5, 0.75
If we take random crops when computing the embeddings we get zoomed in images mostly, a bit boring.
Image inversion #
Now we play with DDIM inversion, followed by editing, as shown in the DALLE-2 paper. We invert our image using standard DDIM inversion as in the original stable diffusion repo., we need to use lots of timesteps. Then check we can decode it to pretty much the same image (if we use cfg it's more saturated). To get good inversion results we use: ddim_steps = 500, start_step=1, cfg scale = 3 (careful with cfg scale! not too high)
For decoding you don't need to use so many timesteps, so it wont take so long, decode with 50 timesteps and you get the original picture back
Now we use our same text diff as before to replace the water with flowers! 10%, 20% 50% 100% and 150% edit:
Or how about turn the house into a lighthouse? 10%, 20% 50% 100% and 150% edit:
We can also use ddim_eta to make variations of our original, but ones that closely match in composition. Here each row is for ddim_eta 0.3, 0.6, and finally 1:
We can make more of these steadily ramping up the value of eta and make a variations video:
Last of all we can combine subtle variation (ddim_eta=0.4) with text diff editing: "ghibli matte painting" -> "dslr leica photo"
- Previous: Latent editing with image variations
- Next: Flowers Deconstructed


